WIN500
(→Using WIN500 to populate a scanner) |
|||
| Line 4: | Line 4: | ||
== Trunked Systems == | == Trunked Systems == | ||
| + | |||
| + | === Open or Closed System? === | ||
| + | |||
| + | If the system has a Wild Card as one of the TGs, it is considered an Open System. Closed Systems do not have a Wild Card TG or the Wild Card TG is locked out so it cannot be scanned. | ||
| + | |||
| + | ---- | ||
=== Importing Trunked Systems and Talk Groups === | === Importing Trunked Systems and Talk Groups === | ||
| Line 62: | Line 68: | ||
---- | ---- | ||
| − | |||
=== Edit Control Channel Frequencies === | === Edit Control Channel Frequencies === | ||
| Line 82: | Line 87: | ||
---- | ---- | ||
| + | |||
| + | |||
== Conventional Frequencies == | == Conventional Frequencies == | ||
Revision as of 18:12, 21 February 2009
Contents |
Using WIN500 to populate a scanner
NOTE: Importing will not work if you are not a Premium Subscriber to the Radio Reference Web site. The key to unlock the utility for importing systems, TGs, and/or conventional frequencies is the Premium Subscription.
Trunked Systems
Open or Closed System?
If the system has a Wild Card as one of the TGs, it is considered an Open System. Closed Systems do not have a Wild Card TG or the Wild Card TG is locked out so it cannot be scanned.
Importing Trunked Systems and Talk Groups
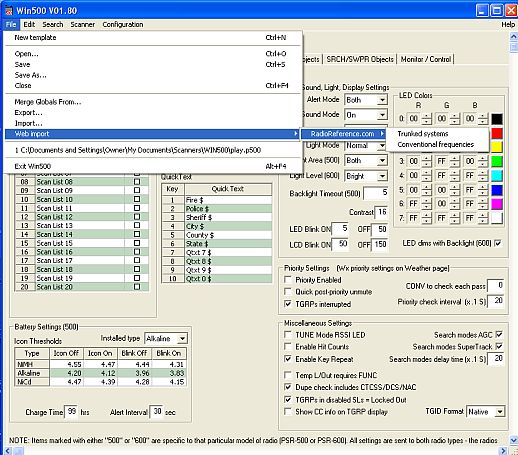
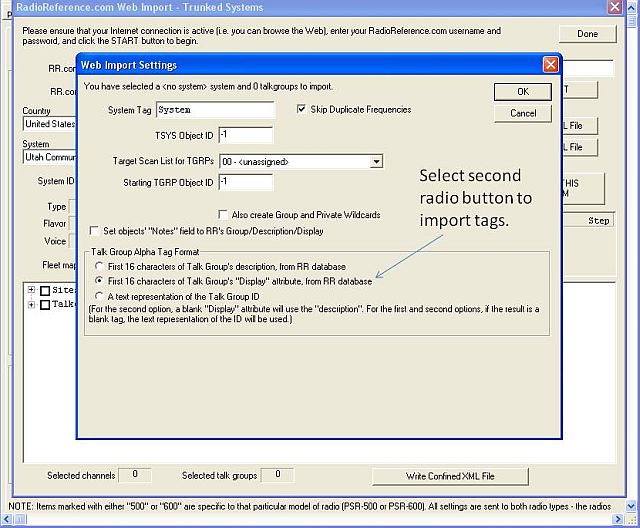
1. To Import from Radio Reference, click File > highlight Web Import > RadioReference.com > select Trunked Systems.
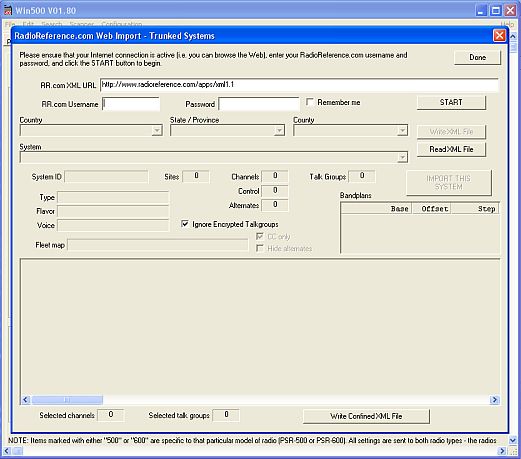
2. On the next page enter your credentials for logging into the Radio Reference Web site then click on "Start."
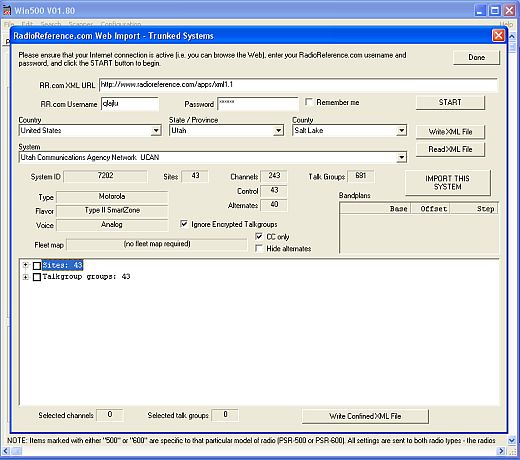
3. Using the drop-down menus, select the Country, State/Province, County, and System.
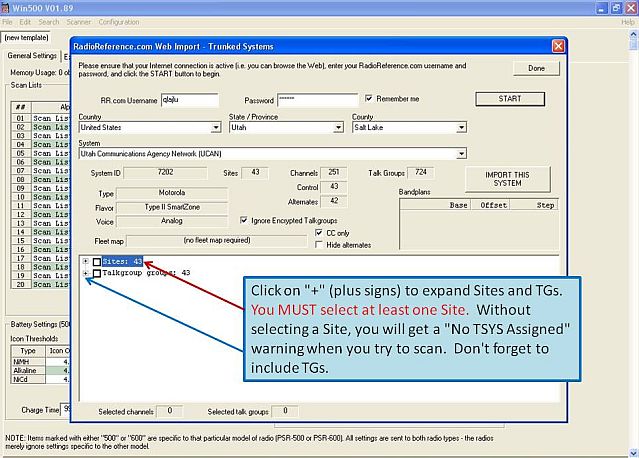
4. Click on the "+" signs to expand the Site(s) and TGs available for the system selected in the step above.
5. Click on "IMPORT THIS SYSTEM." (Any TG without a check mark will not be imported, so check them over before proceeding.)
6. On this page, select the second (middle) radio button to get the correct alpha tags imported with the TGs you have selected in the previous step, then click "OK."
7. Click Done. The software will now populate your scanner with what you have selected. All TGs default into scan list 1.
Adding Individual TGs
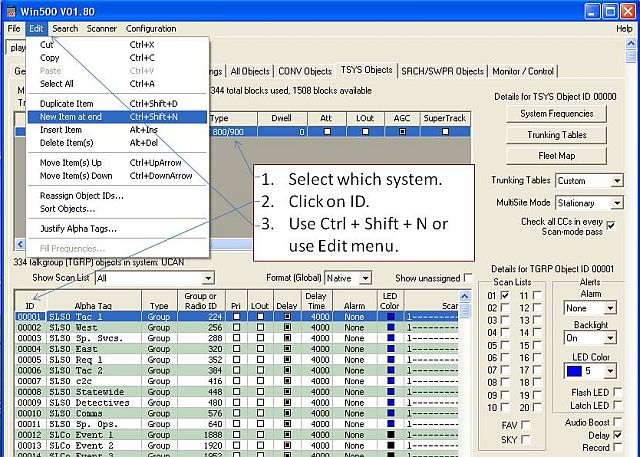
This image shows how to add an individual or specific TG.
1. After selecting the TSYS Objects tab, select the system above the window where you want to add the TG(s).
2. Click on "ID" below the window.
3. Use Ctrl + Shift + N on computer keyboard or click on Edit > New Item at End. The TG added will be a Wild Card TG and can be scanned as a Wild Card or you can edit it to make a specific TG by changing the information in the fields on that line (ID numbers will be assigned by the program automatically).
4. Repeat as necessary to add as many individual/specific TGs as you want.
Edit Control Channel Frequencies
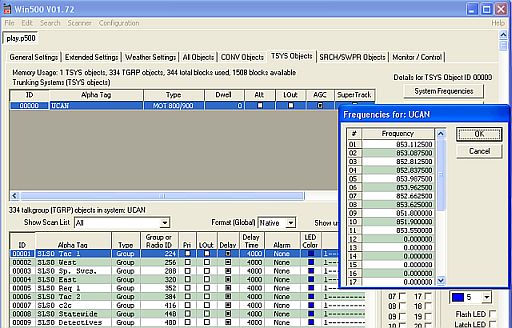
To edit the Control Channel frequencies click on the TSYS Objects tab > click on the System Frequencies bar. After rebanding, all that is necessary is editing the CC frequency as long as a custom band plan is programmed into the scanner.
Custom Band Plan (Trunking Tables)
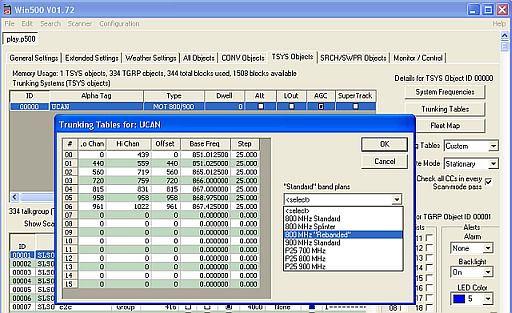
To edit or install a Custom Band Plan (Trunking Tables), click on the TSYS Objects tab > click on the Trunking Tables bar, and when the next window opens, click the drop-down menu and select the appropriate band plan > click OK. For the 800 MHz trunking systems select 800 MHz Rebanded. This band plan or trunking table will be good for systems already rebanded as well as those not yet rebanded.
Conventional Frequencies
Importing Conventional Frequency Systems
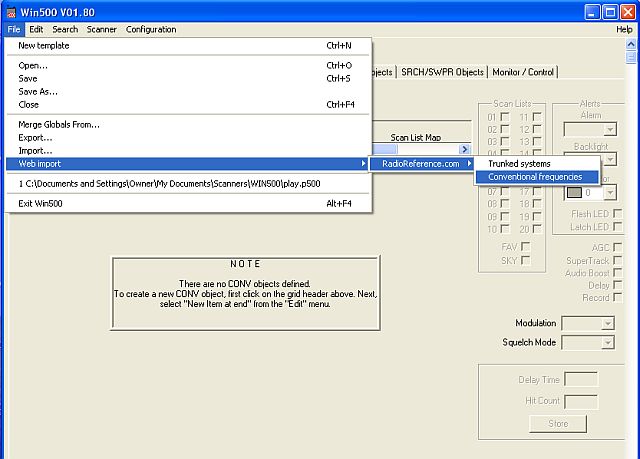
1. To Import from Radio Reference, click File > highlight Web Import > RadioReference.com > select Conventional frequencies.
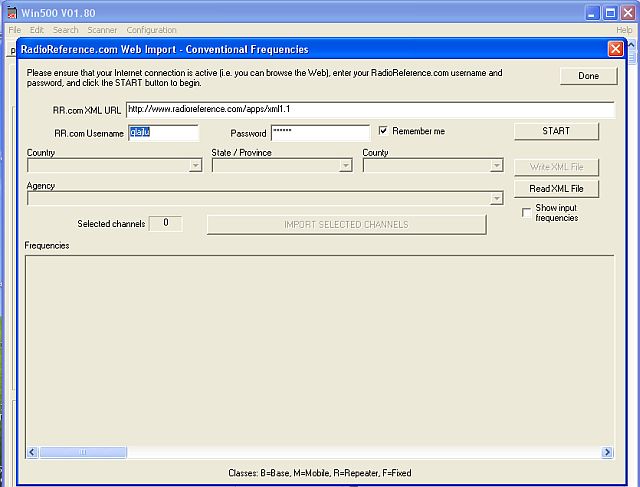
2. On the next page enter your credentials for logging into the Radio Reference Web site then click on "Start."
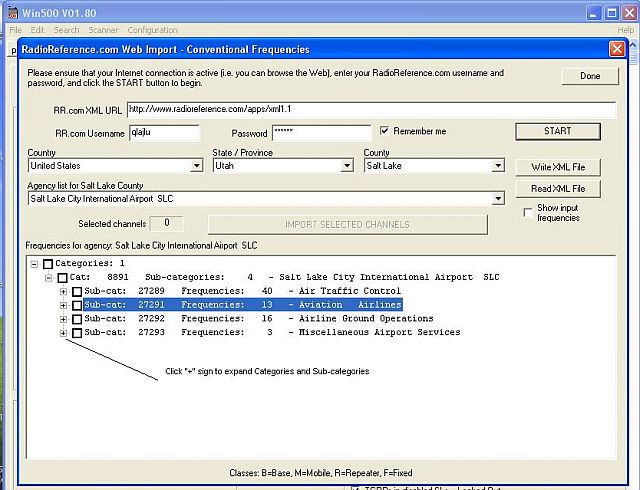
3. Using the drop-down menus, select the Country, State/Province, County, and System.
4. Click on the "+" signs to expand the Categories and Sub-categories available for the system selected in the step above.
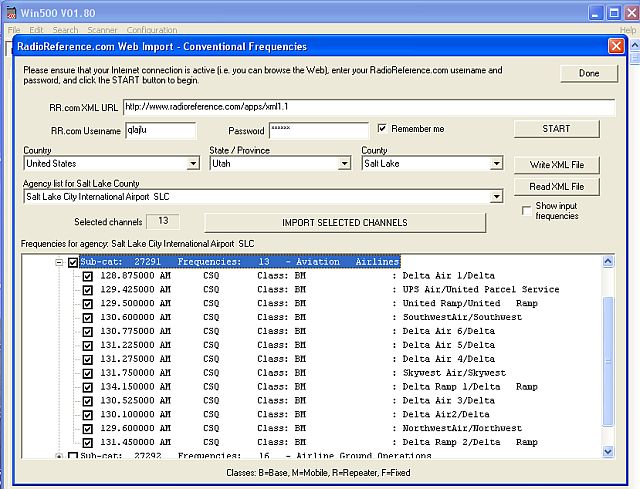
5. Click on "IMPORT SELECTED CHANNELS." (Any frequency without a check mark will not be imported so check them over before proceeding.)
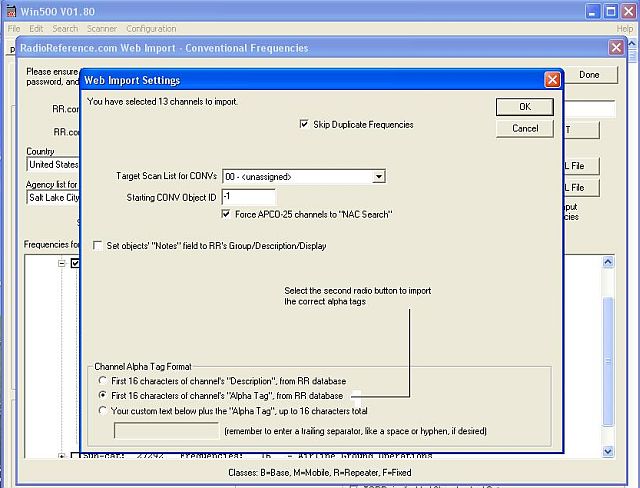
6. On this page, select the second (middle) radio button to get the correct alpha tags imported with the frequencies you have selected in the previous step, then click "OK."
7. Click Done. The software will now populate your scanner with what you have selected. All frequencies default into scan list 1.
Adding Individual Frequencies
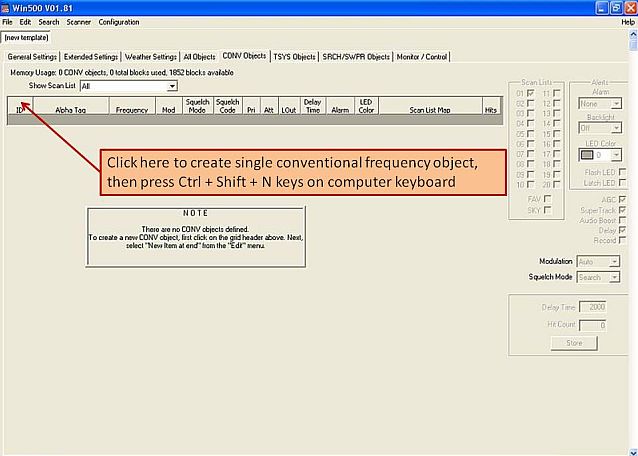
This image shows how to add an individual or specific frequency.
1. After selecting the Conventional Objects tab, click on "ID" (See image) then Ctrl + Shift + N on your computer's keyboard.
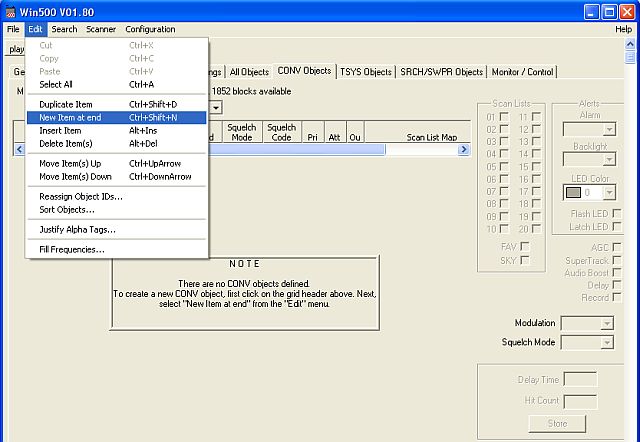
2. You can also click on the Edit menu at the top of the page and then click on "New Item at end" instead of using the keyboard shortcut.
3. You will have to fill the fields in manually after creating the space to accept the new frequency (ID will be automatically assigned by the program).
4. Repeat as necessary to add as many individual/specific frequencies as desired.
qlajlu
