UniTrunker Guide
Highpockets (Talk | contribs) (→Screen shot up and running) |
Highpockets (Talk | contribs) (→Adding A Name To Radio ID's) |
||
| Line 195: | Line 195: | ||
<div style="margin: 0; margin-right:10px; border: 2px solid #B6B6B6; padding: 0 1em 1em 1em; background-color:#ccffff;align:right;"> | <div style="margin: 0; margin-right:10px; border: 2px solid #B6B6B6; padding: 0 1em 1em 1em; background-color:#ccffff;align:right;"> | ||
| − | ''' | + | '''Qlajlu''' |
</div><br> | </div><br> | ||
Revision as of 14:14, 16 March 2011
Contents |
A Guide to Get UniTrunker Up and Running
DISCLAIMER and NOTE:
The images on this page are from UniTrunker V1.0.0.11 and the instructions are geared to users of the GRE PSR-500, PSR-600, PSR800 and Radio Shack Pro-106 and Pro-197. Others can follow this guide but will have to make allowances for the type of scanner used which will provide the feed of the Control Channel Data Stream. The instructions are also geared to a Motorola Type II 800 MHz trunked system. After reading these, you should be able to adjust things to suit your particular circumstances.
These steps were actually used to get UniTrunker up and running with a PSR-600 as the data stream input device. The procedure may be different for other model scanners so users/visitors to this page are invited to make corrections or additions.
UniTrunker will also work with the following Uniden Scanners: BCT15X - BC346XT - BCD396XT - BCD996XT
Check the UniTrunker site periodically for the latest version of the program. These instruction should give you enough info to get you started. Latest version as of February 2, 2011 is 1.0.0.20
Options
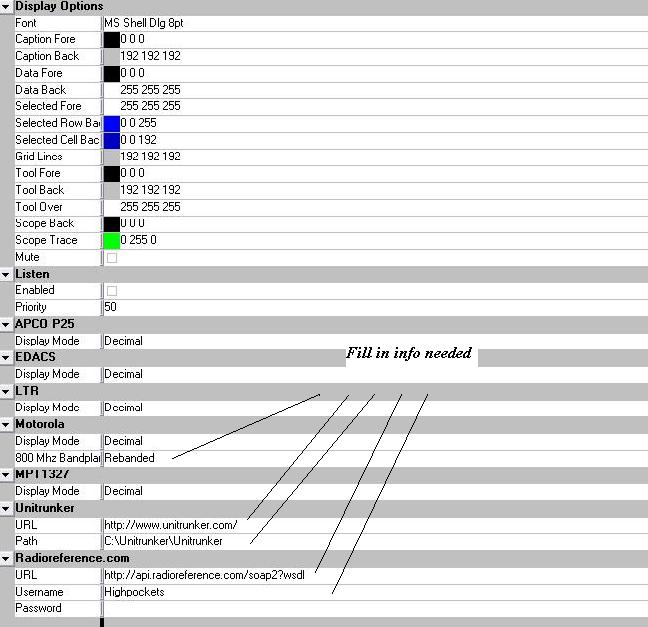
Download the UniTrunker program to your computer and make sure you have a connection to your scanner to receive the feed from it to the computer. Those using GRE-500/600s or their RS clones will use the same cable used to program the scanner. Run the software and you will find the screen below to open first. If it does not, click on the Options tab at the bottom of the page.
Go down the page to Motorola and make sure it says Decimal for Display Mode. If it does not, just click on Display Mode > click the drop-down menu and select Decimal. Click on 800 MHz > Click the drop-down menu > select Rebanded (if you are in Utah, otherwise you might want to select North America).
Go to the right scroll bar and drag it to the bottom. You will see a place to enter the UniTrunker URL (as shown) and the next line down enter the URL for Radio Reference (also as shown) and then your log-in credentials.
Receiver
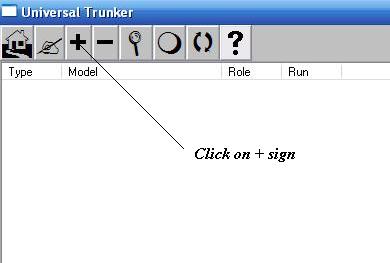
Click on the Receivers tab to open this page.
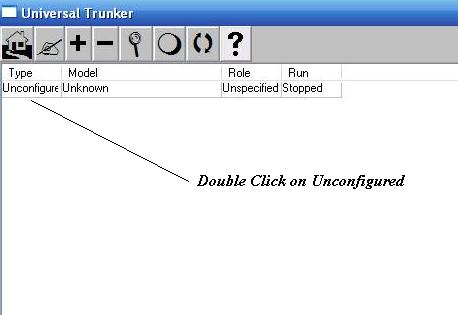
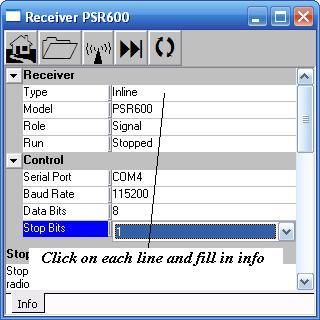
Clicking on the "+" sign creates the line for you to enter the type of scanner and other info needed. This image was taken using a PSR-600 which is using an inline feed and although it shows "PSR500" it is perfectly acceptable because, other than the case, the PSR-500 and PSR-600 are the same scanner.
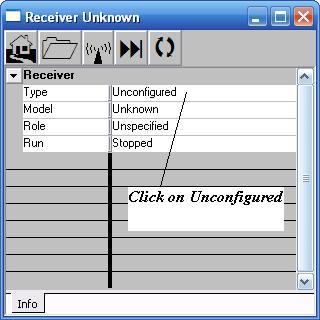
Double click on the line showing Unconfigured (See line pointing to it).
You should now be able to fill in the info for the program to operate. Start with the Unconfigured box and work your way down.
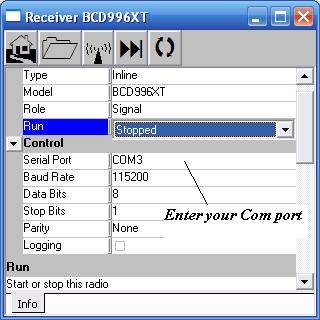
Example for Uniden Scanner
If your using a scanner with a Discriminator Tap and you were using the Retro Version and want to change to the Windows version use the following directions:
From the Receivers tab, click "+". Double-click on the "Unconfigured" receiver. Set the receiver's Type to "Signal"; this will cause additional sections to appear - including Signal and Decode. For receiver model - type in something meaningful like "R8500". For receiver role - use "Signal". Leave the receiver "Run" state at "Stopped" for now. Under the Signal section, fill in the settings comparable to your Unitrunker Retro configuration. Sample Rate of 44100, 48000 or 96000. Sample Size of 16 bits is recommended. Channel of "Mono" is good - unless you were using something different in Retro. Leave the Decode and Feeds sections alone for now. Go back to the receiver "Run" state and set it to "running". Click on the "Scope" tab to see the waveform. Adjust recording level according to instructions on the Unitrunker site.
UniTrunker Link: http://www.unitrunker.com/level.html
Place scanner in proper mode
To set your scanner in the analyzer mode, press the TSYS soft key (F2) on the front of the scanner. Then press the Analyz soft key (F3) on the front of the scanner and using the 5-way key, scroll up or down to find the Control Channel you wish to watch. When you stop scrolling, that will put it in the proper mode to run the Control Channel data stream to the UniTrunker Program.
Start UniTrunker running
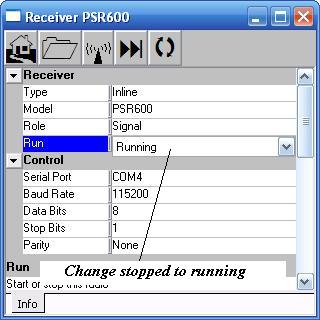
Once you have filled in the lines, double click on "Stopped" and select "Run." The UniTrunker program should now be receiving the data stream from the System Control Channel that you selected on your scanner. Make sure your have the right Com Port selected!
Receiving
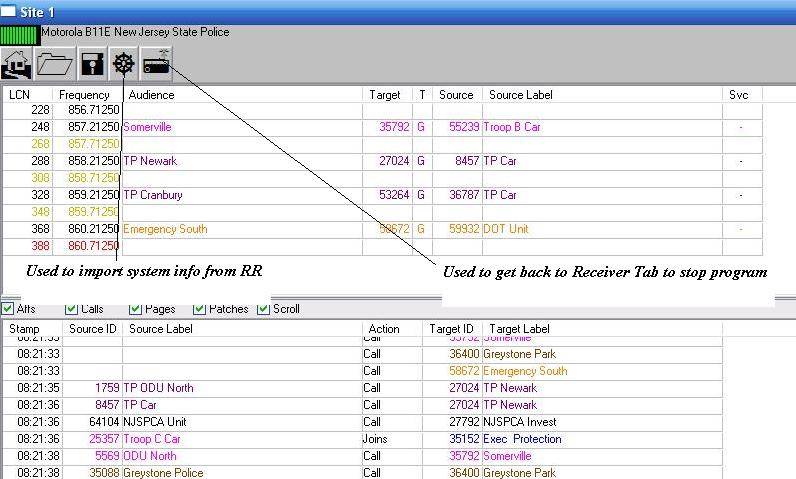
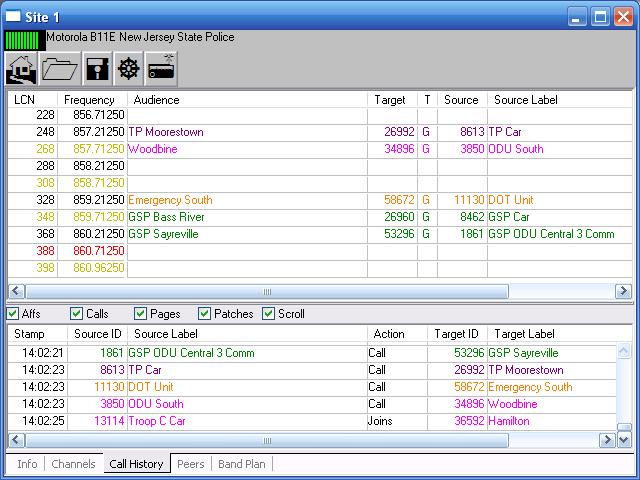
After about 10 to 15 seconds, you will see this screen and you should start seeing activity as TGs join and leave the program. To stop the program, click on the icon that looks like a Radio and the pop-up will return so you can move from running to stopped by clicking the "running" box. The text in the Audience Column can be imported from RadioReference.
At this point, you should be up and running!
Screen shot up and running
Here is an explaination of various Windows displayed in Unitrunker:
http://www.unitrunker.com/windows.html
Call type codes
Motorola Systems
- None - Analog
- All - All TG's
- XP - Patch
- EXP - Emergency Patch
- EMS - Emergency Multi Select
- MS - Multi Select
- DIG - Digital Voice
- DAT - Digital All TG's
- DEM - Digital Emergency
- DXP - Digital Patch
- DEX - Digital Emergency Cross Patch
- DEM - Digital Emergency Multi Select
- DMS - Digital Multi Select
EDACS Systems
- Fon - Telephone Call
- Tst - LCN Tester
- Dat - Data Call
- Ana - Analog Voice Call
- Emg - Emergency Analog Voice Call
- Dig - Digital (Provoice/Aegis) Voice Call
- EmD - Emergency Digital Voice Call
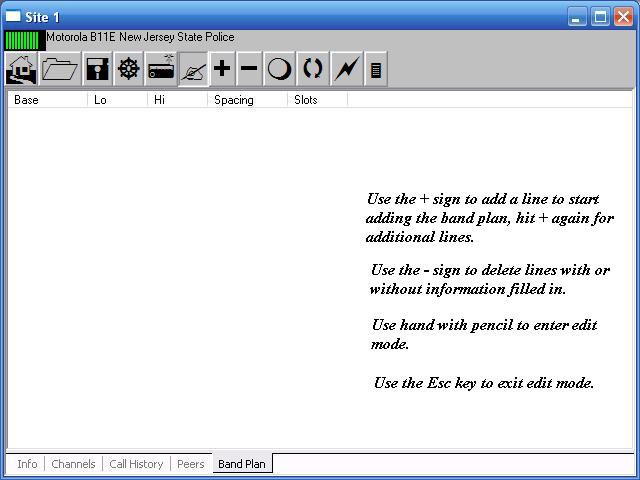
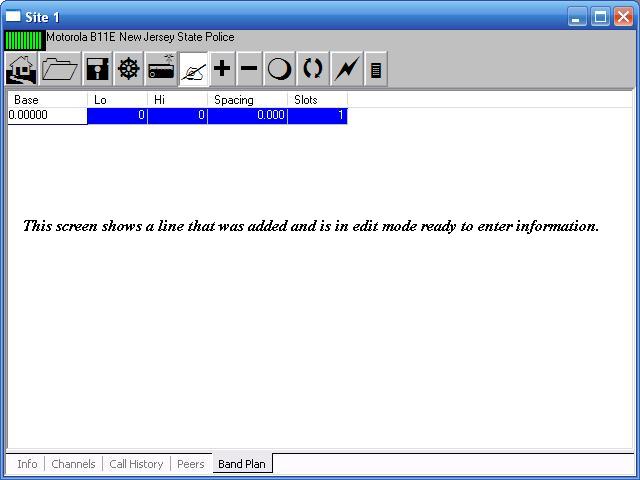
Band Plan Tab
This is where you can add or edit a Band Plan if necessary.
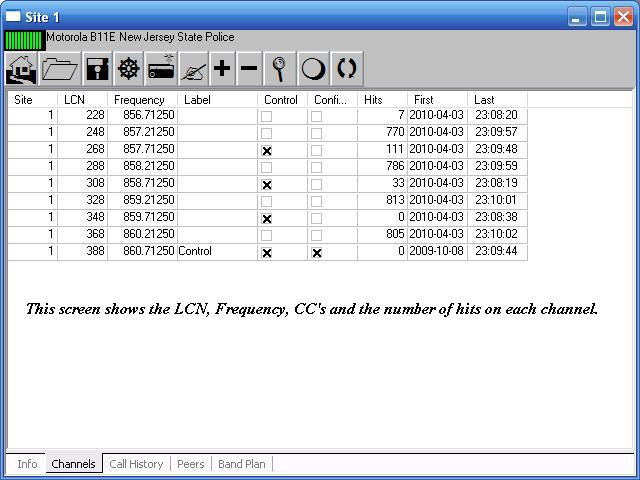
Channels Tab
Adding A Name To Radio ID's
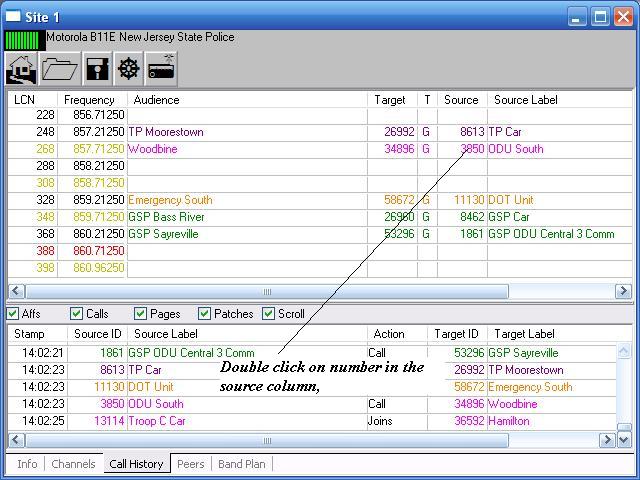
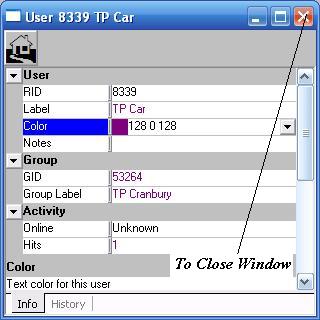
You can add a name to a radio ID by double clicking on the number in the source column, and this screen will appear.
You enter a name in the Label Column, you can also assign a color to that name.
You exit by clicking on the RED X to get back to the Call History screen.
Qlajlu

